Connect all the Blades
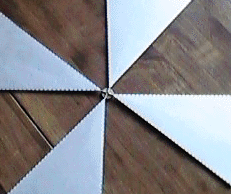
- Arrange four of the Solar Sail blades as shown. Edge-folds face down. Place the blade Connection Rods on top of the corrugated cardboard hub. Place a piece of corrugated cardboard under the wide end of each Solar Sail blade, so their ends will be at the same height as the blade Connection Rods atop the central hub.
- Adjust the blade Connection Rods so they touch to form a + pattern on the center of the hub.

- Adjust the four blades so their centerlines are perpendicular. There must be an equal amount of space between each blade. There is a black dot printed in the center of the outboard edge of each blade, to help you judge where the centerline is.
- Generously apply hot glue to the central hub, letting it flow around all of the blade Connection Rods, and making a good secure connection to the central hub. Be careful not to move the blades while you apply glue. Wait for the glue to harden completely.
- Using an art knife, carefully trim away any excess hardened glue that might extend outside the circle of the central hub. Be very careful to prevent injury: do not have fingers near the blade. Also be careful to prevent bending the Solar Sail blades.
The spacecraft's Solar Sail blades are arranged in two planes, four in one plane, and four in the other plane. Your scale model illustrates this accurately by placing the central cardboard hub between the two planes. The spacecraft's central section is illustrated here.
- Once the glue has hardened, pick up the 4-blade assembly and turn it over on your work surface so the edge-folds all face up.

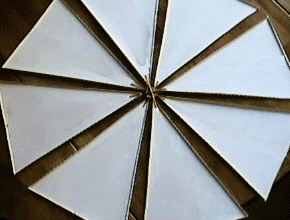
- Arrange the remaining 4 Solar Sail blades between the assembled ones. Keep all the edge folds facing the same way: up.
- Adjust the blade Connection Rods so they touch to form a + pattern on the center of the hub.

- Adjust the four blades so their centerlines are perpendicular. There must be an equal amount of space between each blade.
- Place a piece of corrugated cardboard under the wide end of each of these 4 Solar Sail blades, so their ends will be at the same height as the blade Connection Rods on the central hub.
- Once again, generously apply hot glue to the central hub, letting glue flow around all of the blade Connection Rods, and making a secure connection to the central hub. Be careful not to move the blades while you apply glue. Let the hot-glue gun melt some of the existing glue to "weld" these 4 new blades securely to the central hub.
- Wait for the glue to harden completely.
- Using an art knife, again carefully trim away any excess hardened glue that might extend outside the circle of the central hub. Be very careful to prevent injury. Also be careful to prevent bending the Solar Sail blades.
- Tie a knot at one end of piece of string or thread, and glue it to the central hub. Let the hot-glue gun melt some of the surrounding glue to "weld" the string in place. This will serve to suspend your model when completed. You may wish to tie a loop in the free end of the string.
On to the Next Step...
BACK TO THE SCALE MODEL HOME PAGE

|


