|
Optional:
Add Finishing
Touches
|
|
Here's a placard to print and apply to your model's stand:

- If you would like to add more three-dimensional detail, including science instruments and engineering components, view the original 1:24 scale model. Reduce in size, print, and apply selected detail components to your 1:50 scale model. Refer to the original 1:24 scale model by John Jogerst.
- For a striking bit of metallic sheen, add some wrinkled aluminum foil to the HGA Cover. Be sure to ink in the eight "X" markings on top of the foil.
- Instructions regarding wires to represent the Plasma Waves Instrument have not been included in this version. If your use of the model would NOT POSE ANY EYE HAZARD, you can easily add the wires to your model based on a bit of research. They are not visible on the spacecraft until after launch, when they are deployed by reeling out like a carpenter's steel measuring tape.
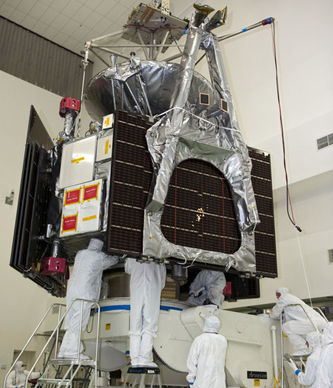
- A well executed internet search can locate many close-up views of the actual Juno Spacecraft being assembled and tested, and artists' conceptions of the spacecraft in flight. Based on what you find, you might want to touch up your basic model with metallic pens and additional 3-dimensional detail. Note that in general, items such as aperture covers and nozzle protectors are colored a bright red, and will be removed before flight. Here's a good place to start: These images of the spacecraft were taken during launch preparations.
BACK TO MAIN PAGE
|