
1/37 SCALE MODEL OF LIGHTSAIL-1

3. Set the sails on the sail booms.
- By sliding the sail-boom wires in or out a little, adjust them so that all four booms extend exactly the same length from the center of the 3U spacecraft.
- Lay the 3U and booms on your work surface, photovoltaic panels upward, and carefully scotch tape each of the four booms down to the surface. Place the tape about halfway out the booms. Adjust the booms' position to be exactly 90° to each other, using a drafting triangle or a square of cardboard, and moving the tape as needed.
Check the distances between the tips of the sail booms. The distances need to be equal to within a millimeter or two. Re-check that the boom lengths are equal.
- Take a sheet of aluminum foil, and cut it, using a paper-trimmer if you have one, into a nearly perfect square. Its sides must be equal in length to your sail boom plus 6 mm. This would nominally be 108 mm + 6 mm = 114 mm.
- Cut out one more good square of the same size.
- Carefully cut each of your squares of foil diagonally into two equal right triangles.
- Notice whether one side of your aluminum foil has a more shiny finish than the other. If so, the shiny surface will be facing upward, toward the side with the CubeSat photovoltaic panels.
- Now we need to place a crease, sort of a hem, along the longest side, the hypotenuse of the right-triangle foil sail. Keep the shiny side facing you, and fold 3 mm of the edge back away from you, using a straightedge to make the crease.
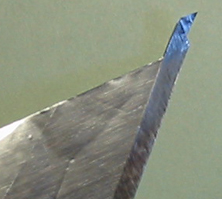 Do this one more time, folding another 3 mm of the long edge over away from you. The purpose of this is to create "ears" on two of the sail's corners, such as in the image at right. It also stiffens the foil a bit, making it easier to work into your model.
- Rub your fingernail on the sail to tighten the crease, and to generally flatten the sail. Lightly rub the sail again so that it will begin to curl toward you as you face the shiny side. This curl will add some realism to your model, as if the sunlight were billowing the sail a little.
- Install the foil sail by sliding the "ears" underneath the tips of two booms. Line up the sail so that there will be a tiny gap, perhaps a millimeter or less, between the sail's edge and the length of each boom. See the image at right (click the image to enlarge), and also see the images on the LightSail-1 website (here and here). The right-angle corner of the sail should just touch the CubeSat bus, but if it falls short a little, that will be okay for now.

- Once you are satisfied with the sail's alignment, place a drop of glue to join each sail ear to the tip of its boom. Be careful not to glue the sail or boom tip to your work surface!
Let the glue dry thoroughly before proceeding.
- Repeat the steps above to make and install the three remaining sails.
- Once the glue dries, flip the "ears" over to hide the joints.
- Carefully remove the scotch tape; you can do this by reaching in with your X-Acto knife and slitting the scotch tape to release the booms. Check for unintended gluing of boom tips to your work surface. Release the sailcraft.
Turn the spacecraft over, photovoltaics downward on your work surface. Using tiny droplets of glue, join the sails' right-angle corners to the 3U bus. Use this picture to judge where to attach them. That's the view from the "bottom" or anti-sunward side.
Glue one sail at a time, letting the glue dry thoroughly each time. If a sail does not quite reach the 3U bus, add a scrap of paper or foil to extend the glue from sail to bus.
- This completes your LightSail-1 model.
Be sure to watch the LightSail Program as solar sailing takes flight, at www.planetary.org.
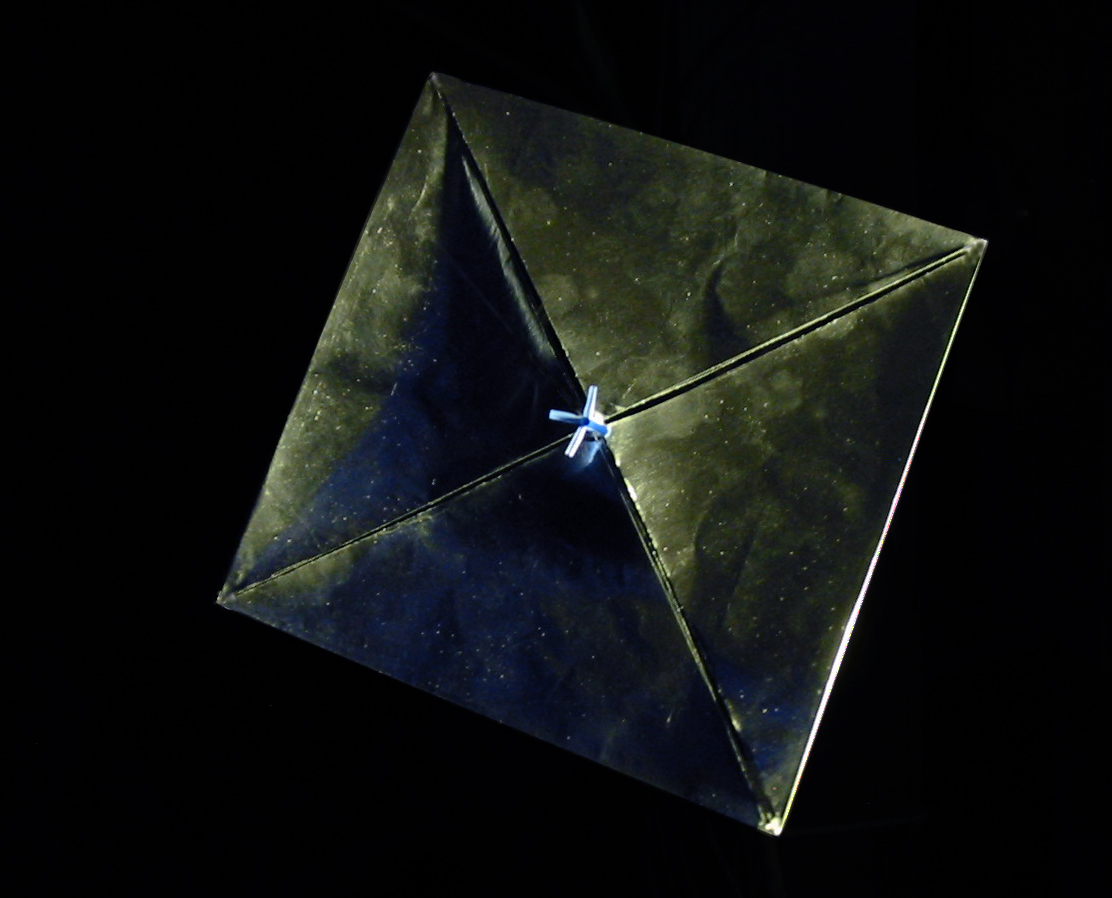
ASSEMBLED LIGHTSAIL-1 1/37 SCALE MODEL
CLICK IMAGE TO ENLARGE.
|
|
Designed and contributed to members of The Planetary Society by SCI Space Craft
International, Pasadena, California USA.
SCI WAS ESTABLISHED 1987, AND HAS BEEN CONDUCTING SALES VIA THE WEB SINCE 1993.
www.SpacecraftKits.com
|
|