10. INSTALL THE SOLAR ARRAYS.
View the whole assembled model
You're very near completion of your HST model.
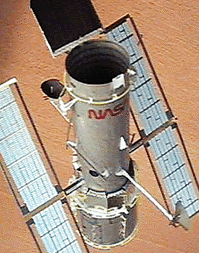
The Solar Arrays twist in unison to follow the Sun as the spacecraft rotates to observe objects in the universe. Covered with photovoltaic cells, the arrays convert sunlight directly into electrical current, to power all the HST's systems.
- From sheet B release a SOLAR ARRAY. Bend a 90-degree crease into both of its long, lengthwise dark-grey edge-hinges, folding down away from you. Begin by bending them over a straightedge such as a metal ruler.
- Apply glue to the yellow area on a SOLAR ARRAY SUPPORT strut. Position the middle of the SOLAR ARRAY onto the glue, with the hinge-folds facing away from the support strut. Position it so that the support strut extends halfway across the SOLAR ARRAY. You will be gluing the support strut to half of a gold-colored mid-section on the array. Be careful with alignment. If you view the model from directly above the keel fitting, the two-dimensional impression should be that the solar array and the telescope tube are parallel.
- Repeat with the other SOLAR ARRAY, checking for symetrical alignment.
