Assemble the
Spacecraft Bus
|

|
- Print Parts Sheet B on card stock.
- Lay the printed Parts Sheet B on a cutting surface, and use an art knife and metal ruler to cut out the Spacecraft Bus. Note the fold lines indicated by the red arrows. With art knife and ruler, lightly score each fold line.
- Fold the Spacecraft Bus into a ring and glue. Make a sharp crease in each fold line, folding down away from the printed side, toward the inside.
- Cut out the Bus Top Panel and glue it onto the top edge of the Spacecraft Bus. You'll see how the tab on the Bus Top Panel aligns with the Spacecraft Bus side.
- Cut out the Bus Bottom Panel and make a hole in the center, marked by the white dot.
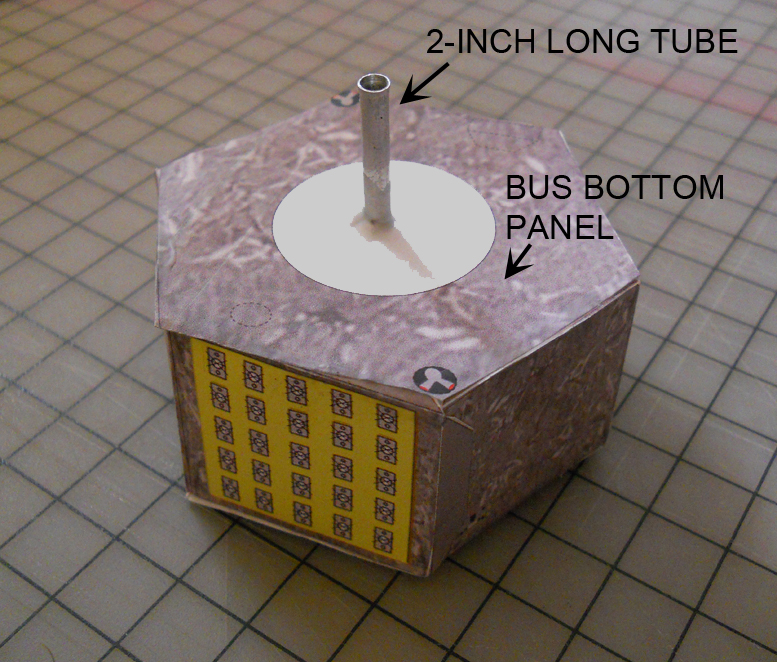
- Obtain a narrow tube, such as a soda straw, whose diameter will fit onto your model stand (see suggested model stand on the first page). Cut the tube to about 2 inches or 5 cm. Apply glue to one end and set it inside the Spacecraft Bus, centered touching the inside of the Bus Top Panel.
- Work the tube up through the hole in the center of the Bus Bottom Panel, and glue the Bus Bottom Panel to the Spacecraft Bus tabs. Align the tube perpendicular and glue it in place where it comes out through the Bus Bottom Panel.

- Cut out the Launch Vehicle Payload Adapter, glue it into a circle, and glue it to the Bus Bottom Panel surrounding the grey circle.
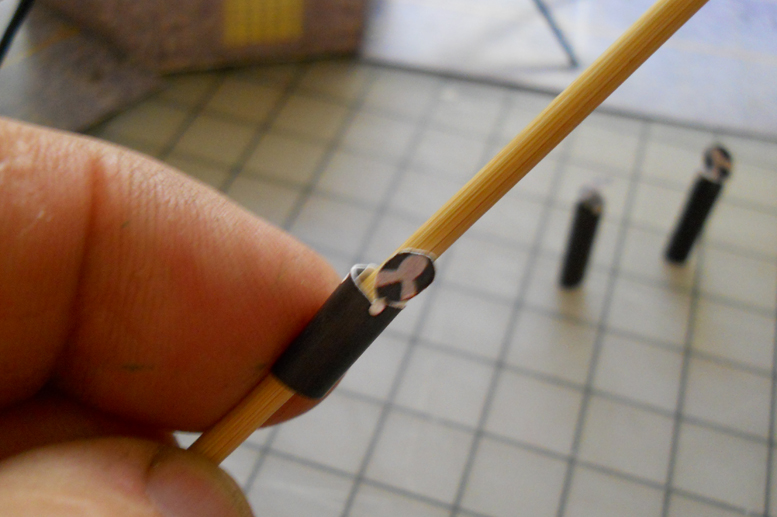
- Cut out the two, smaller, Reaction Control System Thrusters For Bottom of Bus. Roll them into thin cylinders with their circular caps, and glue to hold their shape. Glue them standing up from the two corners of the Bus Bottom Panel as indicated by the printed icons.

- Cut out the Vault from Parts Sheer B, score for folding using art knife and ruler, and glue it into its box shape. Set the Vault aside for now.