Magellan
Space Craft™ SCIENCE KIT
Assembly Instructions
Web Version 5.6
|

|
These instructions are for use with a Magellan Space Craft SCIENCE KIT.
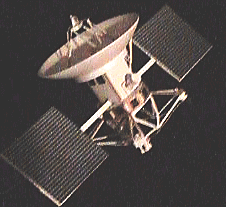
The photo shows an assembled Magellan Space Craft (tm) SCIENCE KIT. Click the image to see five more views.
YOU'LL NEED THE FOLLOWING:
- Small scissors, such as manicure scissors, to release parts from the parts sheets.
- A pencil or pen.
- Glues. Use white glue (Elmer's Glue-All or equivalent), or "TACKY GLUE" (Aleen's Original or equivalent). White glue lets go of the plastic HIGH-GAIN ANTENNA dish (HGA), so use BOND 484 White Cement which adheres fairly well to plastic. Or, for best strength, use BOND 527 Multi-Purpose Cement for the HGA. BOND glues are sold in art stores, or from Bond Adhesives, Newark, NJ Also, a low moisture glue, such as Glue Stick (UHU or equivalent) will be used for the solar panels.
- Wooden toothpicks for applying glue.
- Optional:
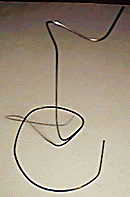
 You may wish to fashion a stand for your model. A simple stand can be made by bending a length of wire. Brass wire from a hobby store, or steel wire such as coat hanger wire, will work. About half a meter, or 18 inches, in length is plenty. Such a stand may also be convenient to support parts during assembly. If you choose to work with wire, be cautious to prevent eye injury, especially when cutting the wire, when fragments may fly. This image shows a stand made of soft iron wire obtained from a craft store.
- An art knife, X-Acto #11 or equivalent, with a sharp new blade.
- A metal ruler or straightedge to help make some folds.
- Space. Set up a well lighted, comfortable work area, with room to set glued parts to dry.
- Time. Plan several hours for unhurried assembly. Four hours are probably minimum.
- Patience. There may be some trying times. Extra care will pay off with a surprisingly accurate, and handsome model of the NASA'S Venus mapping spacecraft.
- Optional: You might use an electric hair drier to set glue, but be careful not to blow the pieces apart.
BEFORE BEGINNING ASSEMBLY:
- Examine all the parts on both sheets, and read their names.

- Notice the RELEASE POINTS you'll need to clip to release parts from the parts sheets. Also notice HINGES, where parts will be folded.
- Read all of these instructions. Compare model parts with the illustrations.
- Have a look at the Magellan Fact Sheet, and browse NASA's Magellan web site.
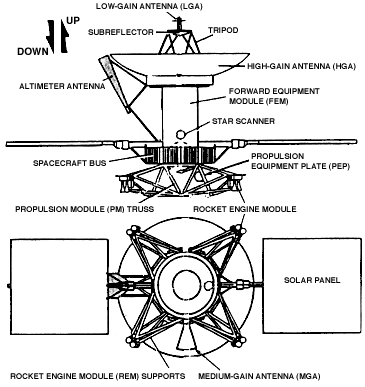
- Get your bearings. The following sketches define UP and DOWN in the instructions. "Inboard" means toward the center of the spacecraft, and "Outboard" means away from center.

IN GENERAL:
- If these instructions don't say which way to fold a piece, it may be folded in either direction.
- After releasing a piece from the Parts Sheets, trim off any remaining release points, but be careful not to remove tabs to be used in assembly.
TO ASSEMBLE YOUR MODEL:
Click on each step below for illustrated step-by-step instructions.
Congratulations!
YOU'VE FINISHED YOUR Magellan Space Craft (tm) SCIENCE KIT.
About your Magellan Model
Your model's scale is approximately 1/30. The HGA is four times thicker than scale, and incorporates a spherical figure instead of the parabolic figure on the spacecraft's antenna. Sheets A and C are made of 100% recycled paper. Sheet B is made of 50% recycled paper, while the others are 100%. The HGA is made of expanded polystyrene (EPS) foam, which contains 15% recycled material.
Now that you're familiar with all of the spacecraft's major structures and its science instrument, be sure to browse NASA's Magellan web site to learn more about the spacecraft, its mission, and all about its many discoveries. Also, be sure to see the following from SCI:
| TOP OF THIS PAGE |
* Asterisks identify steps which may be done independantly, in case more than one people are working on the kit, or if you wish to work on another step while the glue dries.


 You may wish to fashion a stand for your model. A simple stand can be made by bending a length of wire. Brass wire from a hobby store, or steel wire such as coat hanger wire, will work. About half a meter, or 18 inches, in length is plenty. Such a stand may also be convenient to support parts during assembly. If you choose to work with wire, be cautious to prevent eye injury, especially when cutting the wire, when fragments may fly. This image shows a stand made of soft iron wire obtained from a craft store.

